As soon as I saw the first page in Ottobre's Spring 2010 magazine I knew I had to make this coat. I absolutely love it, it's one of my favourite coat patterns from all of their magazines and I'll be making one each for the Baby, the Monkey and the Niece. I'd happily size it up for the Princess too, we'll see what she says!
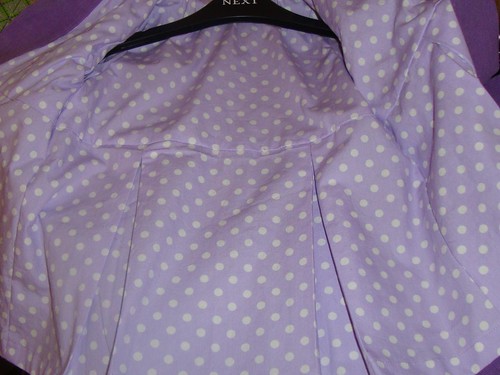
This is part of the Baby's Spring SWAP, the outer is a very lightweight lavender babywale corduroy that I've had in my stash for a good year or so and the lining is a lavender/white polka dot woven. I found a use for one of my skinny minky scraps, it has made the softest, snuggliest collar you could imagine.
This is a really, really nice pattern to sew. It went together very quickly with no problems at all. I haven't sewn the buttons on yet, I couldn't get the right size locally so have to wait on my online order arriving. I'll be making fabric covered buttons from the lavender cord.
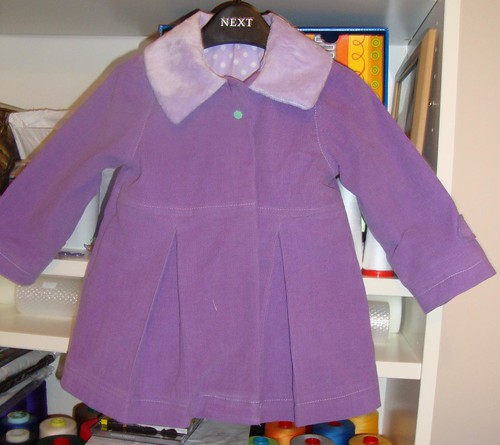
Here's the front:
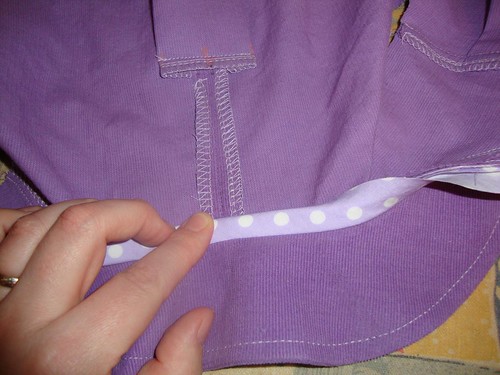
The back - ignore the wonky collar, it's folded over unevenly!
The lining:
And the incredibly soft collar, wish I had one of these on my coat!
One down, two to go!
Sunday, 24 January 2010
Ottobre 1/2010 #12 Sewalong
The Spring 2010 issue of Ottobre has a really sweet pinafore in it, the gorgeous hot pink tunic here on the left. I decided to make it as part of the Baby's Spring SWAP and have taken lots of pics of the process for a Sewalong Tutorial. I remember how intimidating I found pleats when I started sewing and with Ottobre's sparse instructions I think beginners could be put off simply by all the dotted foldlines on the pattern :) So here's an illustrated guide to this lovely little pinny.
STEP ONE - PREP
Fuse your interfacing to all the pattern pieces shaded in grey in the magazine. Personally, I don't usually bother but as I was using a very lightweight corduroy I chose to take the extra time for this garment.
STEP TWO - THE BACK
Here's the back piece, viewed from the wrong side. I've used a washable marker to draw on the foldlines and have numbered them 1 - 5. You can see where I've finished the centre back edges and the top of the pleat with my serger.
Fold the back, right sides together (RST) along foldline 3 - the centre back edges should line up. Stitch this seam from neckline to the mark at the start of foldine 1.
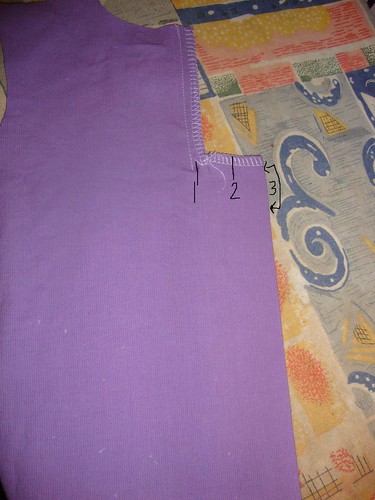
Open out the back piece and it looks like this from the right side
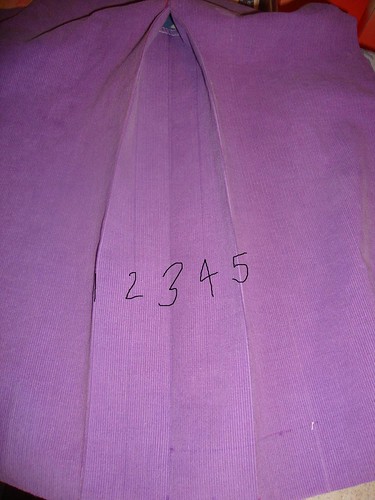
You want to fold lines 1, 2, 4 and 5 in a concertina kind of way so they meet up at line 3, like this:
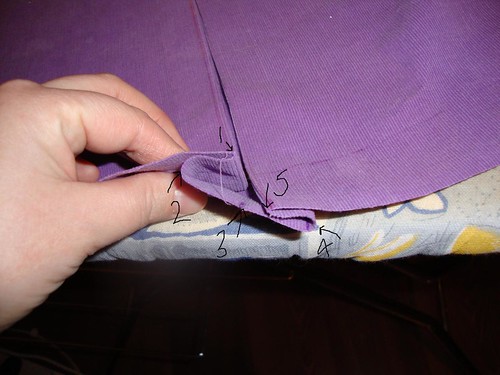
The inside looks like this:
From the right side you now stitch across the top of the pleat to hold all of the layers in place.
From the wrong side you can see the stitching line has sewn through the seam allowance at the top of the folded pleat.
STEP 3 - THE FRONT
Next are the two pleats on the front skirts. Fold RST along foldine 3, lines 1,5 and 2,4 will match up. Stitch along line 1 for 2cm (I only had an imperial ruler handy so stitched 1" instead).
Fold the pleat as you did for the back, concertina style with lines 1 and 5 meeting at line 3, lines 2 and 4 form the edges of the 'box' on the underside.
Repeat for the other front skirt piece. Once they're both done stitch the skirts to the bodices, line up the marks for the centre front and facing foldline. Finish the seams and press towards the bodice then topstitch from the right side. I love my 1/4" quiting foot for sewing woven fabrics. It has a hole 3/8" away from the fabric guide which is perfect for my preferred width seam allowance on wovens, then the 1/4" mark makes for even topstitching.
STEP 3 - JOINING FRONT AND BACK
Nice and simple, place the shoulders RST together, stitch and finish the seams. Place the side seams RST, stitch and finish the seams. I like to press the seams towards the back. When you're done it looks almost like a dress!
As an aside, here's what happens if you turn your back on your three year old for a moment then start serging without checking she hasn't fiddled with any dials....
Much better after being fixed!
Next up, finish the raw edge of the bottom hem. I use my serger and as this dress has a curved hem I set the differential feed to slightly gather the fabric, this will help it to sit flat when I turn it up to stitch it.
STEP 4 - THE COLLAR
Ottobre tells you to finish the armholes just now but I'm leaving that till last, so let's skip to the collar! Place the two pieces RST and stitch the outer curved edge. I then like to finish the seams with a small, tight zigzag as close to the first line of stitching as I can get then trim the seam allowance right up to the zigzag.
When I turn the collar right side out and press it the curve sits really flat and smooth because there's a minimal seam allowance, it looks a lot nicer than my old method of clipping the curves then turning. Topstitch round the outer edge and baste the inner neckline edges together.
Pin the collar to the right side of the dress neckline, matching the shoulder and centre back marks and placing the ends of the collar at the centre front marks. Fold the front facings along their foldlines, to the right side of the dress, on top of the collar.
Take your collar binding piece, pin it right sides together on top of the collar and stitch it in place along the seamline you just stitched.
Press the binding up towards the seam allowance, fold it over the raw edges then flip the now enclosed seam down towards the dress neckline.
Stitch it in place close to the edge. You will be able to see this stitching on the right side of the dress but it will be covered by the collar so don't panic if it's not perfectly neat.
Turn the front facings right way out, fold them back to the wrong side and the collar is done.
STEP 5 - ARMHOLES
I like to get all the binding out of the way at the same time so this is when I chose to finish the armholes. They are bound in the same way you bound the collar. Stitch the bias strip into a circle, sew it RST to the armhole, fold it towards then over the seam allowance and then turn the whole thing to the wrong side of the armhole. The raw edges of the seam allowance will be enclosed inside the binding. Stitch the binding in place close to the edge and press. This is fiddly, take your time and don't stress if it puckers slightly!
STEP 6 - HEM
Turn up and press the hem. If you gathered it slightly when finishing the raw edge earlier it will sit nice and flat when you press it up.
To get a nice, neat finish on the front fold the hem down again then fold the front facing back along its foldline to the right side. Stitch across the crease made by pressing the hem, trim the top layer of fabric inside the hem and then turn it the right way out again. The thin black line here is where I have stitched across the facing, you can see where I trimmed to the right of this.
When the facings are then turned the right way out and folded back to the wrong side then the inside looks like this:
And the finished front corner looks like this on the outside:
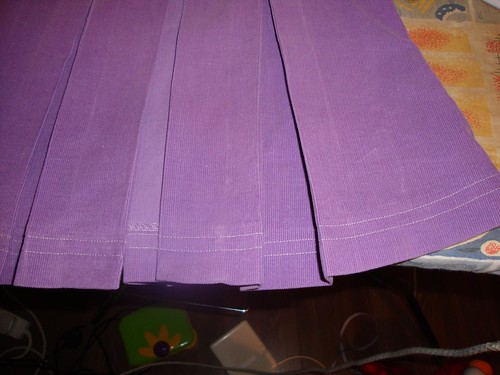
Stitch your hem with whatever stitch you like, I went for a simple double row of straight stitching. Remember to unfold the pleats while stitching.
STEP 7 - BACK BELT
The back belt covers up the row of stitching you made earlier to hold the top layers of the pleat in place. You can follow Ottobre's instructions or you can make a slight change that I like as I find it gives me a better shape to the finished piece. Place the pieces RST and stitch them together ALL the way around, don't leave a gap for turning right side out. Finish the seam allowance with a very small, narrow zigzag and trim as close to this stitching as you can without cutting it, just like we did with the collar. Carefully make a slit in the fabric on the WRONG side of the belt and turn it right side out through this slit.
Press lightly then hand sew the opening closed. No-one will ever see it, it doesn't have to be perfect or pretty - my hand sewing is very far from pretty! Topstitch around the belt and pin it in place on the back of the dress, centering it over the stitching at the top of the pleat. Sew on two buttons to secure it.
STEP 8 - BUTTONS
Last step, sew your buttonholes and buttons on the front. Give the dress a final pressing and that's it, all done!
Phew! I hope that all made sense and I hope I didn't forget any steps! Any questions, leave a comment and I'll get back to you as I can.
STEP ONE - PREP
Fuse your interfacing to all the pattern pieces shaded in grey in the magazine. Personally, I don't usually bother but as I was using a very lightweight corduroy I chose to take the extra time for this garment.
STEP TWO - THE BACK
Here's the back piece, viewed from the wrong side. I've used a washable marker to draw on the foldlines and have numbered them 1 - 5. You can see where I've finished the centre back edges and the top of the pleat with my serger.
Fold the back, right sides together (RST) along foldline 3 - the centre back edges should line up. Stitch this seam from neckline to the mark at the start of foldine 1.
Open out the back piece and it looks like this from the right side
You want to fold lines 1, 2, 4 and 5 in a concertina kind of way so they meet up at line 3, like this:
The inside looks like this:
From the right side you now stitch across the top of the pleat to hold all of the layers in place.
From the wrong side you can see the stitching line has sewn through the seam allowance at the top of the folded pleat.
STEP 3 - THE FRONT
Next are the two pleats on the front skirts. Fold RST along foldine 3, lines 1,5 and 2,4 will match up. Stitch along line 1 for 2cm (I only had an imperial ruler handy so stitched 1" instead).
Fold the pleat as you did for the back, concertina style with lines 1 and 5 meeting at line 3, lines 2 and 4 form the edges of the 'box' on the underside.
Repeat for the other front skirt piece. Once they're both done stitch the skirts to the bodices, line up the marks for the centre front and facing foldline. Finish the seams and press towards the bodice then topstitch from the right side. I love my 1/4" quiting foot for sewing woven fabrics. It has a hole 3/8" away from the fabric guide which is perfect for my preferred width seam allowance on wovens, then the 1/4" mark makes for even topstitching.
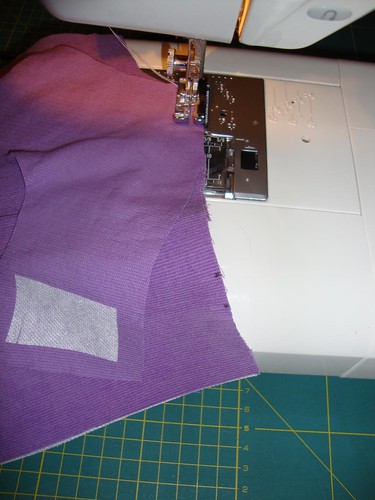
STEP 3 - JOINING FRONT AND BACK
Nice and simple, place the shoulders RST together, stitch and finish the seams. Place the side seams RST, stitch and finish the seams. I like to press the seams towards the back. When you're done it looks almost like a dress!
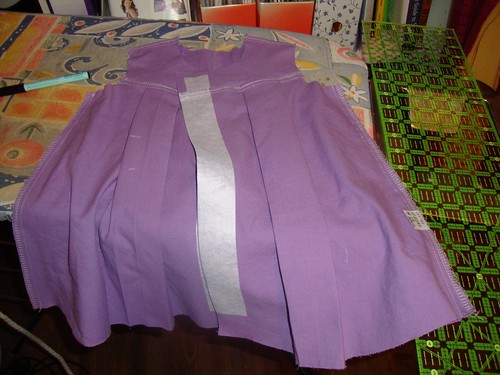
As an aside, here's what happens if you turn your back on your three year old for a moment then start serging without checking she hasn't fiddled with any dials....
Much better after being fixed!
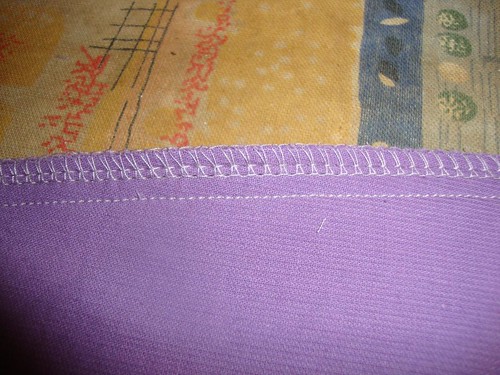
Next up, finish the raw edge of the bottom hem. I use my serger and as this dress has a curved hem I set the differential feed to slightly gather the fabric, this will help it to sit flat when I turn it up to stitch it.
STEP 4 - THE COLLAR
Ottobre tells you to finish the armholes just now but I'm leaving that till last, so let's skip to the collar! Place the two pieces RST and stitch the outer curved edge. I then like to finish the seams with a small, tight zigzag as close to the first line of stitching as I can get then trim the seam allowance right up to the zigzag.
When I turn the collar right side out and press it the curve sits really flat and smooth because there's a minimal seam allowance, it looks a lot nicer than my old method of clipping the curves then turning. Topstitch round the outer edge and baste the inner neckline edges together.
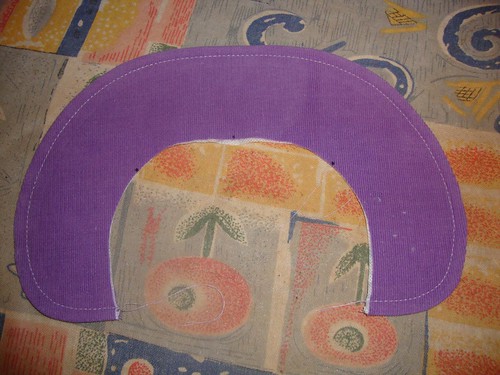
Pin the collar to the right side of the dress neckline, matching the shoulder and centre back marks and placing the ends of the collar at the centre front marks. Fold the front facings along their foldlines, to the right side of the dress, on top of the collar.
Take your collar binding piece, pin it right sides together on top of the collar and stitch it in place along the seamline you just stitched.
Press the binding up towards the seam allowance, fold it over the raw edges then flip the now enclosed seam down towards the dress neckline.
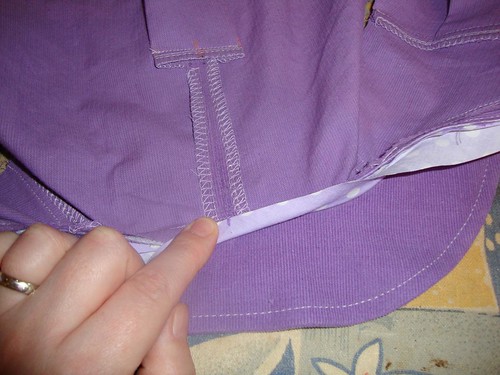
Stitch it in place close to the edge. You will be able to see this stitching on the right side of the dress but it will be covered by the collar so don't panic if it's not perfectly neat.
Turn the front facings right way out, fold them back to the wrong side and the collar is done.
STEP 5 - ARMHOLES
I like to get all the binding out of the way at the same time so this is when I chose to finish the armholes. They are bound in the same way you bound the collar. Stitch the bias strip into a circle, sew it RST to the armhole, fold it towards then over the seam allowance and then turn the whole thing to the wrong side of the armhole. The raw edges of the seam allowance will be enclosed inside the binding. Stitch the binding in place close to the edge and press. This is fiddly, take your time and don't stress if it puckers slightly!
STEP 6 - HEM
Turn up and press the hem. If you gathered it slightly when finishing the raw edge earlier it will sit nice and flat when you press it up.
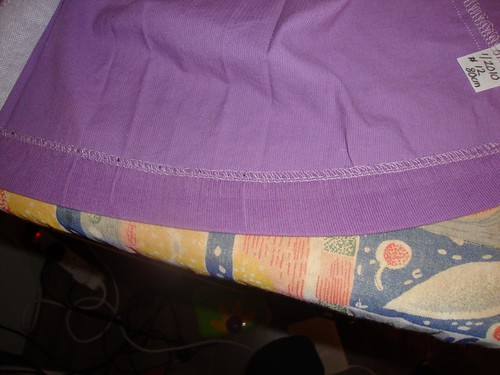
To get a nice, neat finish on the front fold the hem down again then fold the front facing back along its foldline to the right side. Stitch across the crease made by pressing the hem, trim the top layer of fabric inside the hem and then turn it the right way out again. The thin black line here is where I have stitched across the facing, you can see where I trimmed to the right of this.
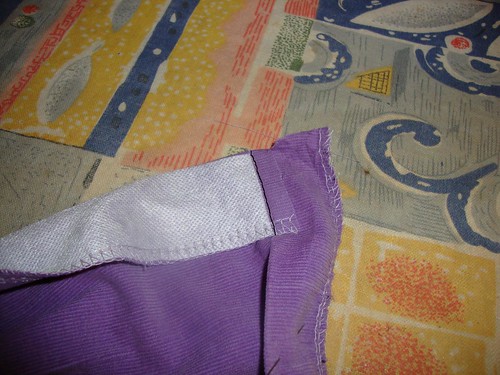
When the facings are then turned the right way out and folded back to the wrong side then the inside looks like this:
And the finished front corner looks like this on the outside:
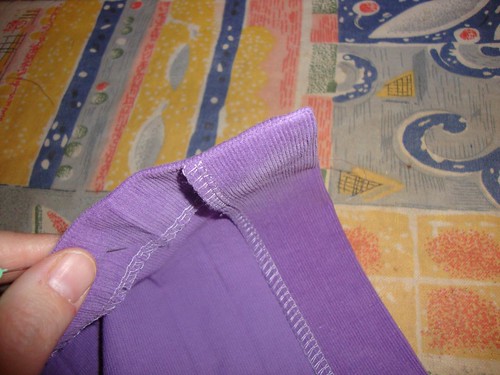
Stitch your hem with whatever stitch you like, I went for a simple double row of straight stitching. Remember to unfold the pleats while stitching.
STEP 7 - BACK BELT
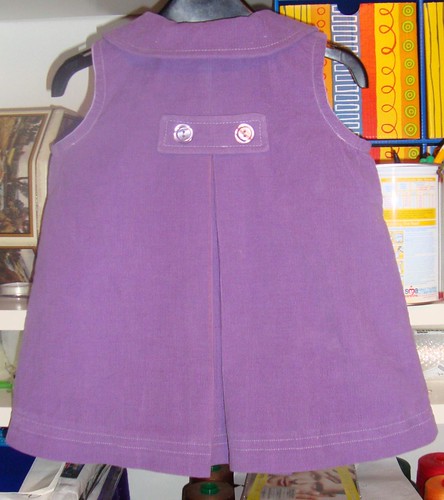
The back belt covers up the row of stitching you made earlier to hold the top layers of the pleat in place. You can follow Ottobre's instructions or you can make a slight change that I like as I find it gives me a better shape to the finished piece. Place the pieces RST and stitch them together ALL the way around, don't leave a gap for turning right side out. Finish the seam allowance with a very small, narrow zigzag and trim as close to this stitching as you can without cutting it, just like we did with the collar. Carefully make a slit in the fabric on the WRONG side of the belt and turn it right side out through this slit.
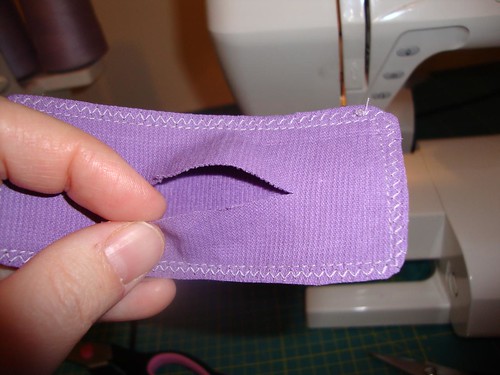
Press lightly then hand sew the opening closed. No-one will ever see it, it doesn't have to be perfect or pretty - my hand sewing is very far from pretty! Topstitch around the belt and pin it in place on the back of the dress, centering it over the stitching at the top of the pleat. Sew on two buttons to secure it.
STEP 8 - BUTTONS
Last step, sew your buttonholes and buttons on the front. Give the dress a final pressing and that's it, all done!
Phew! I hope that all made sense and I hope I didn't forget any steps! Any questions, leave a comment and I'll get back to you as I can.
Wednesday, 20 January 2010
Planning a Spring SWAP
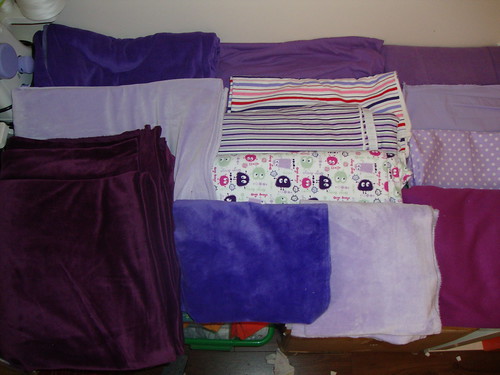
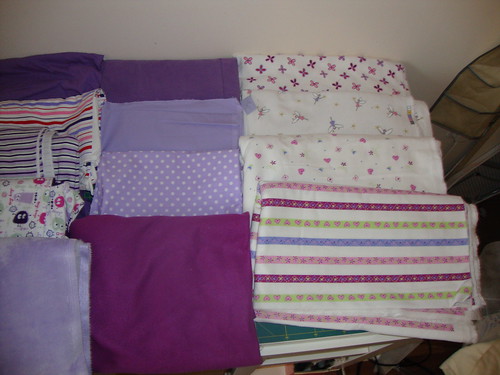
Sewing With A Plan. Not something I've tried before but something I have wanted to try for a long time. I'll be using mostly Ottobre patterns and trying to follow the guidelines from the Ottobre English Yahoo group's last SWAP. So far I have managed to pick my fabrics! Lavender/purple colours for the Baby.
Here they all are together:
A closer view of the left side. The leftmost column is velour, the front one is more of a plum colour than in the photo. The second column has two jersey's at the back, two interlocks then two thin strips of minkee that I will use as trim somewhere.
And the right side, the rightmost column is all corduroy and the second from right has corduroy at the back, a really lightweight stretch poplin, polka dot woven cotton then a purple microfleece.
I will try to grab a few hours later this evening to go through my magazines and decide exactly what I want to make, it should be fun!
Monday, 18 January 2010
Ottobre vests and trousers
Can you take the excitement of yet more baby vests?? I certainly couldn't, these were almost too thrilling to sew ;P More Ottobre 05/06 long sleeve vests for my niece, 86cm this time as she's done that annoying baby thing where they suddenly sprout a few centimetres overnight....
Ivory
Lonesome pink
The coverstitch binder makes this so fantastically easy - when it works that is! It had me ready to throw it out the window when it suddenly decided to behave after refusing to stitch properly for three hours!
And a pair of Ottobre trousers from the scraps, I made this more to check the fit and see if my sister likes the style, I don't really like it in these fabrics. She will look like an ice cream! The pattern is Ottobre 05/06 #3, again in 86cm.
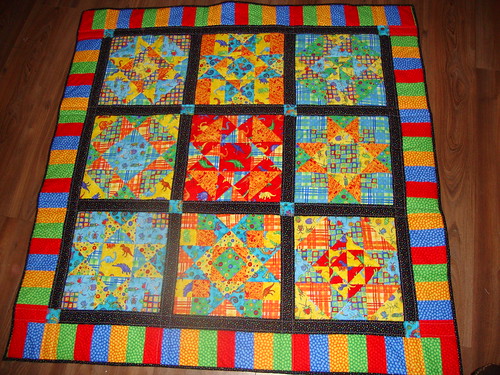
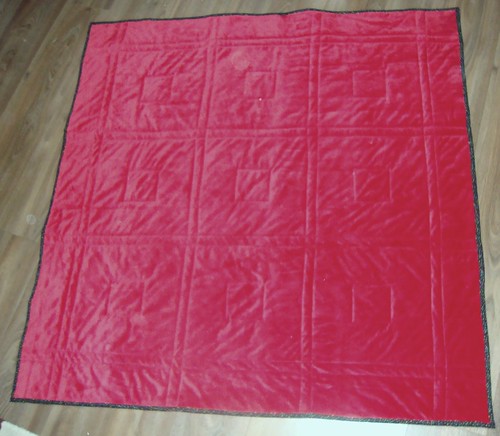
"Nine by Nine" quilt finished!
A fanfare if you please......
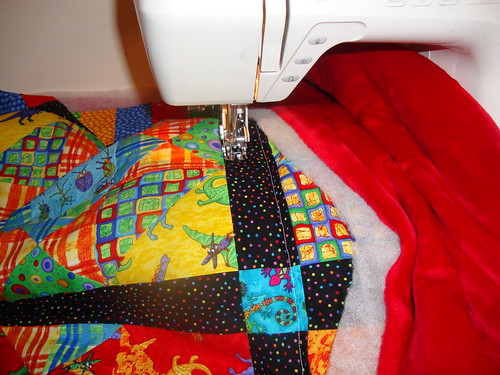
Phew! The Boy has been waiting on this quilt for over a year now, he was very very happy to open up the blanket drawer last night and see it there waiting for him. I was very very glad to finally have it done lol! The main hold up this time was the backing fabric, he wanted red minkee. Nothing else would do, it had to be minkee and it had to be RED please. I finally found some at a decent price on Etsy, ordered it at the end of November and it arrived January 11th! Just a bit late for Christmas then. Never mind, it's done now and he's happy so I'm happy :)
I tried straight line quilting on this one, outlining the sashing and the centre blocks of each star. It turned out OK but I prefer stippling or meandering, my straight lines aren't really that straight.
Friday, 8 January 2010
Farbenmix Olivia and Ottobre Vilkas in Ooga
Ah, Olivia, how I have missed you! This really is the cutest little dress pattern which for some reason I haven't made for ages. So here we have one from the last of the pink/orange Ooga Booga colourway that I used for the Baby's Christmas Eve pj's. I happened to spot a pale yellow polka dot cotton lycra in the stash while searching for something else entirely and thought yay! that'll go nicely and do you know what? It does.
Here's the dress on it's own, I made the 86/92 to put away for the Baby. Yes, I know, sewing something that won't fit till next autumn is a bit obsessive but at least it's not too small. I made layered sleeves and decided at the last minute to add the hood, I *love* the hood but the knots bother my kids especially in their car seats. Simple solution, I shall leave it unknotted.
Someone on the Ottobre sewing group asked recently about the difference between Olivia and Ottobre's Hilda/Tilda pattern, the Olivia is much more....shapely....than Ottobre's hooded dress which is very straight cut. Olivia's hood is much prettier too and she twirls very nicely.
I dusted off my coverstitch for the hems, it decided to play nicely and the lovely bright yellow thread is very cheery in the middle of winter.
There was plenty of the polka dot knit left to make a pair of matching trousers so I went back to Ottobre and made a pair of the Vilkas trousers, #2 from Autumn 2008. Very quick pattern, nice bootcut shape and not too high in the rise for my shortwaisted kids. I've left off the waist elastic as these aren't for just now, I'll put it in when they actually fit her. Here's the whole outfit.
Subscribe to:
Posts (Atom)