STEP ONE - PREP
Fuse your interfacing to all the pattern pieces shaded in grey in the magazine. Personally, I don't usually bother but as I was using a very lightweight corduroy I chose to take the extra time for this garment.
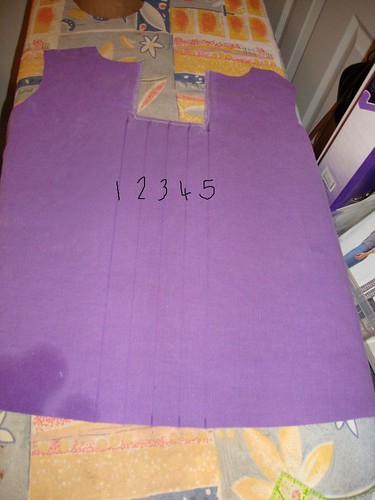
STEP TWO - THE BACK
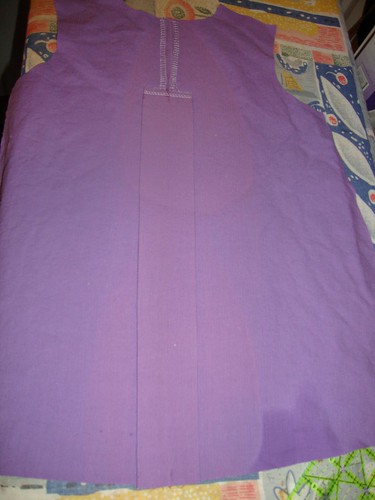
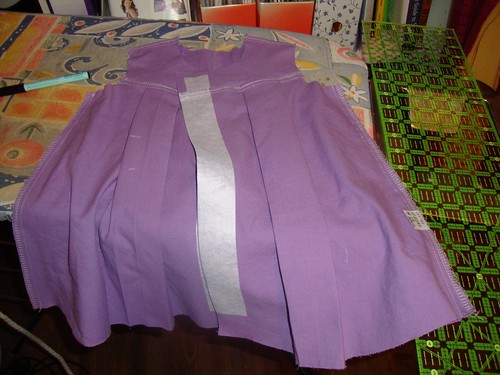
Here's the back piece, viewed from the wrong side. I've used a washable marker to draw on the foldlines and have numbered them 1 - 5. You can see where I've finished the centre back edges and the top of the pleat with my serger.
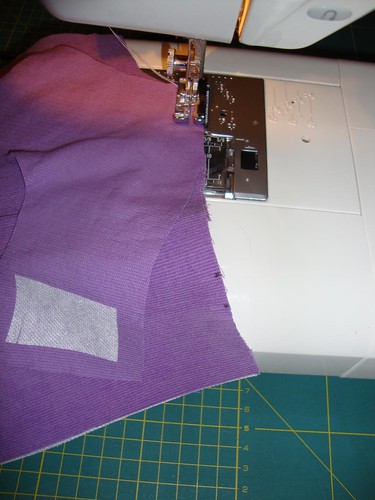
Fold the back, right sides together (RST) along foldline 3 - the centre back edges should line up. Stitch this seam from neckline to the mark at the start of foldine 1.
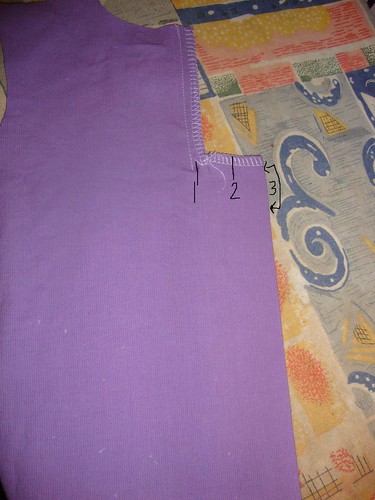
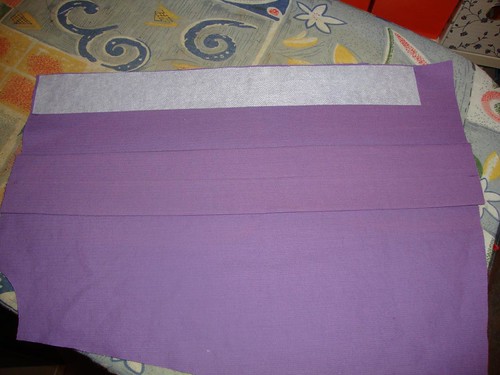
Open out the back piece and it looks like this from the right side
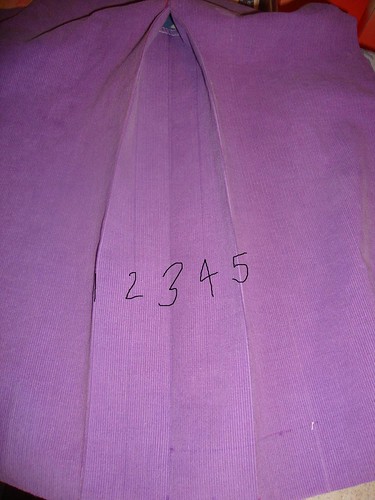
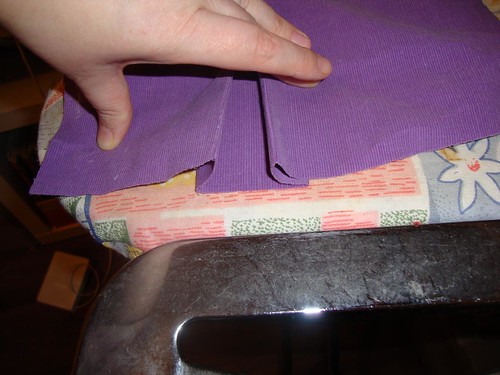
You want to fold lines 1, 2, 4 and 5 in a concertina kind of way so they meet up at line 3, like this:
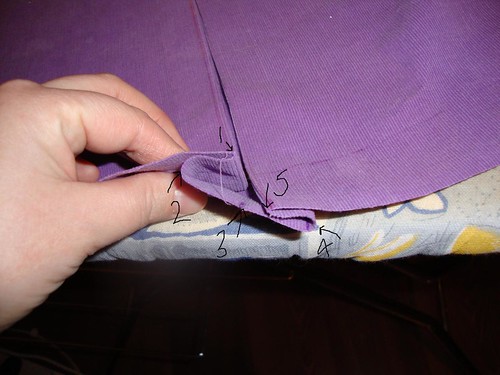
The inside looks like this:
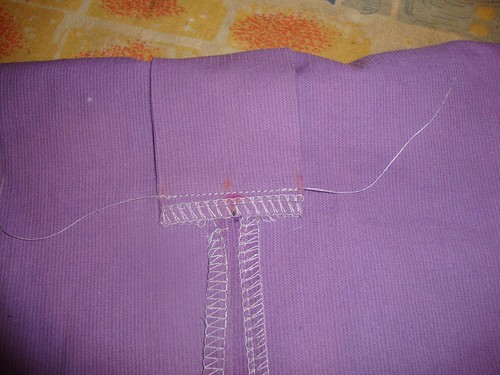
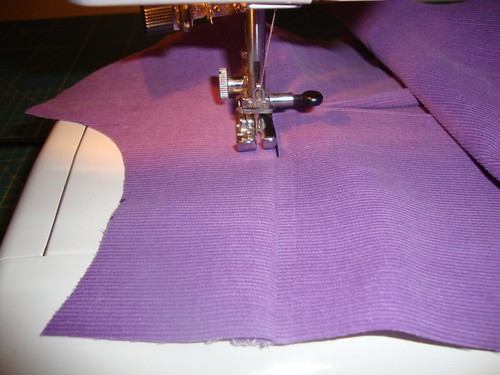
From the right side you now stitch across the top of the pleat to hold all of the layers in place.

From the wrong side you can see the stitching line has sewn through the seam allowance at the top of the folded pleat.
STEP 3 - THE FRONT
Next are the two pleats on the front skirts. Fold RST along foldine 3, lines 1,5 and 2,4 will match up. Stitch along line 1 for 2cm (I only had an imperial ruler handy so stitched 1" instead).

Fold the pleat as you did for the back, concertina style with lines 1 and 5 meeting at line 3, lines 2 and 4 form the edges of the 'box' on the underside.
Repeat for the other front skirt piece. Once they're both done stitch the skirts to the bodices, line up the marks for the centre front and facing foldline. Finish the seams and press towards the bodice then topstitch from the right side. I love my 1/4" quiting foot for sewing woven fabrics. It has a hole 3/8" away from the fabric guide which is perfect for my preferred width seam allowance on wovens, then the 1/4" mark makes for even topstitching.
STEP 3 - JOINING FRONT AND BACK
Nice and simple, place the shoulders RST together, stitch and finish the seams. Place the side seams RST, stitch and finish the seams. I like to press the seams towards the back. When you're done it looks almost like a dress!
As an aside, here's what happens if you turn your back on your three year old for a moment then start serging without checking she hasn't fiddled with any dials....
Much better after being fixed!
Next up, finish the raw edge of the bottom hem. I use my serger and as this dress has a curved hem I set the differential feed to slightly gather the fabric, this will help it to sit flat when I turn it up to stitch it.

STEP 4 - THE COLLAR
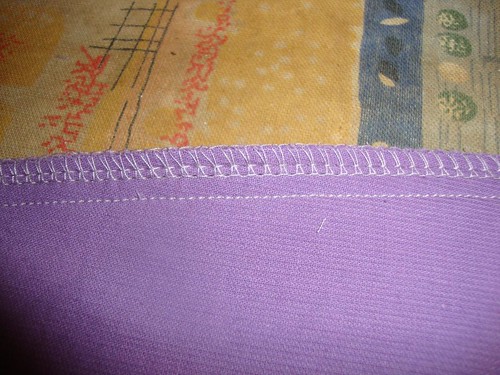
Ottobre tells you to finish the armholes just now but I'm leaving that till last, so let's skip to the collar! Place the two pieces RST and stitch the outer curved edge. I then like to finish the seams with a small, tight zigzag as close to the first line of stitching as I can get then trim the seam allowance right up to the zigzag.
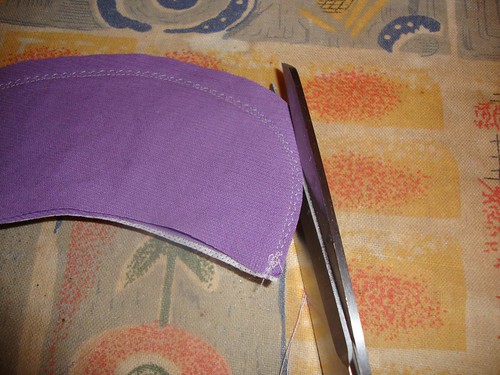
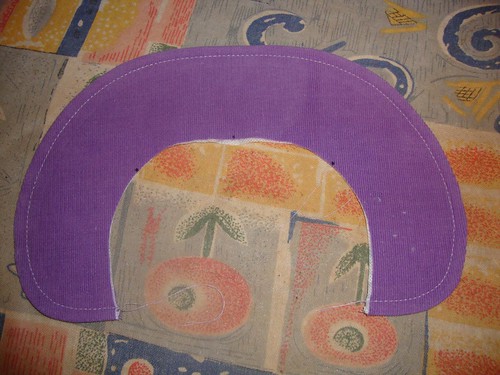
When I turn the collar right side out and press it the curve sits really flat and smooth because there's a minimal seam allowance, it looks a lot nicer than my old method of clipping the curves then turning. Topstitch round the outer edge and baste the inner neckline edges together.
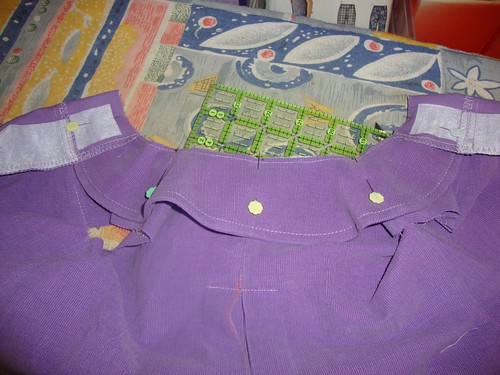
Pin the collar to the right side of the dress neckline, matching the shoulder and centre back marks and placing the ends of the collar at the centre front marks. Fold the front facings along their foldlines, to the right side of the dress, on top of the collar.
Take your collar binding piece, pin it right sides together on top of the collar and stitch it in place along the seamline you just stitched.

Press the binding up towards the seam allowance, fold it over the raw edges then flip the now enclosed seam down towards the dress neckline.
Stitch it in place close to the edge. You will be able to see this stitching on the right side of the dress but it will be covered by the collar so don't panic if it's not perfectly neat.

Turn the front facings right way out, fold them back to the wrong side and the collar is done.
STEP 5 - ARMHOLES
I like to get all the binding out of the way at the same time so this is when I chose to finish the armholes. They are bound in the same way you bound the collar. Stitch the bias strip into a circle, sew it RST to the armhole, fold it towards then over the seam allowance and then turn the whole thing to the wrong side of the armhole. The raw edges of the seam allowance will be enclosed inside the binding. Stitch the binding in place close to the edge and press. This is fiddly, take your time and don't stress if it puckers slightly!

STEP 6 - HEM
Turn up and press the hem. If you gathered it slightly when finishing the raw edge earlier it will sit nice and flat when you press it up.

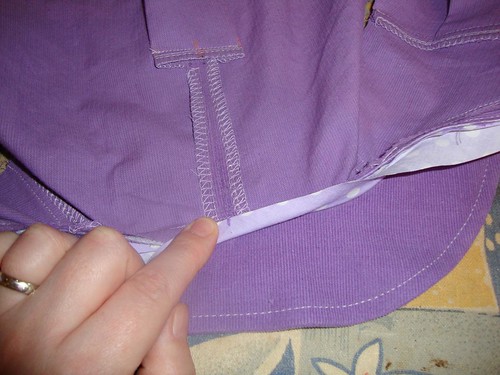
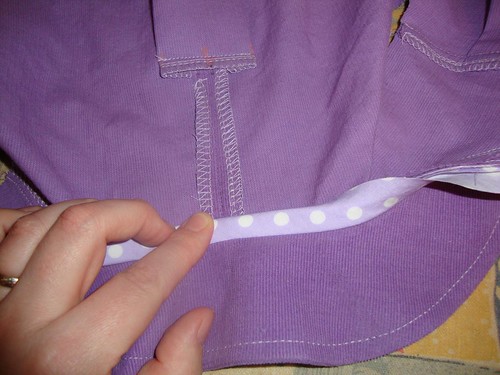
To get a nice, neat finish on the front fold the hem down again then fold the front facing back along its foldline to the right side. Stitch across the crease made by pressing the hem, trim the top layer of fabric inside the hem and then turn it the right way out again. The thin black line here is where I have stitched across the facing, you can see where I trimmed to the right of this.
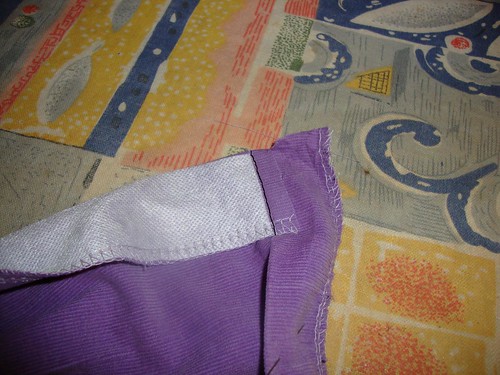
When the facings are then turned the right way out and folded back to the wrong side then the inside looks like this:

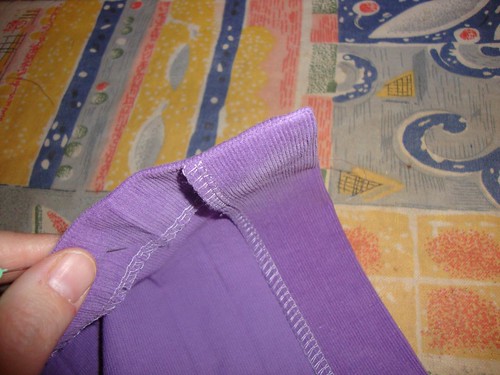
And the finished front corner looks like this on the outside:
Stitch your hem with whatever stitch you like, I went for a simple double row of straight stitching. Remember to unfold the pleats while stitching.

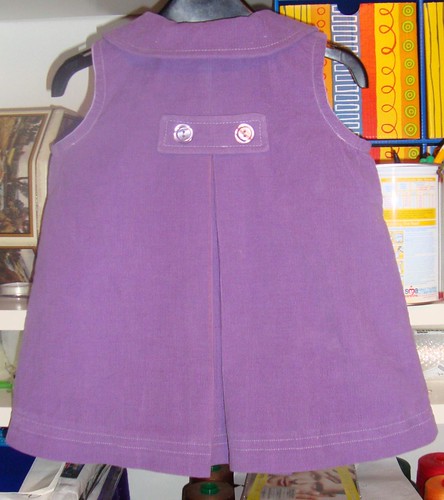
STEP 7 - BACK BELT
The back belt covers up the row of stitching you made earlier to hold the top layers of the pleat in place. You can follow Ottobre's instructions or you can make a slight change that I like as I find it gives me a better shape to the finished piece. Place the pieces RST and stitch them together ALL the way around, don't leave a gap for turning right side out. Finish the seam allowance with a very small, narrow zigzag and trim as close to this stitching as you can without cutting it, just like we did with the collar. Carefully make a slit in the fabric on the WRONG side of the belt and turn it right side out through this slit.
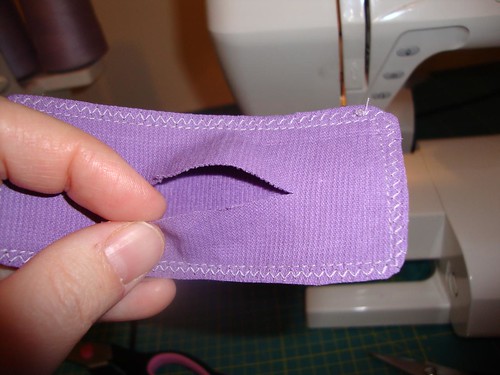
Press lightly then hand sew the opening closed. No-one will ever see it, it doesn't have to be perfect or pretty - my hand sewing is very far from pretty! Topstitch around the belt and pin it in place on the back of the dress, centering it over the stitching at the top of the pleat. Sew on two buttons to secure it.
STEP 8 - BUTTONS
Last step, sew your buttonholes and buttons on the front. Give the dress a final pressing and that's it, all done!

Phew! I hope that all made sense and I hope I didn't forget any steps! Any questions, leave a comment and I'll get back to you as I can.
WOW! You do beautiful work. Thanks for the tutorial, you make it look so easy. The jacket is beautiful too.
ReplyDeleteAmazing, I will have to remember this, I plan to make one for my nieces.
ReplyDeleteWow, I always love it when someone takes the time to show the "sewing world" how things are done. I will have to link your post on my blog tonight. Thanks so much, and I love the dress. Cannot wait to see modelled pics.
ReplyDeleteJeannine
It's gorgeous! You have given me the courage to try it, right after I print out your tutorial! :)
ReplyDeleteWhat a wonderful sew-a-long. Very nice sewing.
ReplyDeleteWhat a great idea for turning the belt back. I'll have to remember that. My rectangles always look wonky when I do it the other way.
ReplyDeleteThank you!!!!
Thanks everyone :) Mickey, it was a tip I picked up on another sewing list and it has been well used! Great for pockets too, especially ones with curved edges. If you use fusible interfacing for the lining 'fabric' then you will interface your pocket as well as getting a nice smooth edge on the curves.
ReplyDelete